How to Use the XMAX V3 Pro, V4 Pro and Starry 4: Loading, Heating and First Session
To use an XMAX V3 Pro, V4 Pro or Starry 4: remove the battery protection tab, charge it with the supplied USB-C cable, take off the magnetic cap, loosely pack finely ground dry herb into the oven (never above the top of the chamber), and click the power button three times to switch on. In session mode the device vibrates when it is ready and a timer counts down, and in on-demand mode (V3 Pro and V4 Pro) you hold the power button to heat. Use the up and down buttons to change the temperature.
The steps below follow the manufacturer's manuals for each model. The three are related but not identical, which our naming guide explains, so differences are marked as we go. Water pipe use is covered in a separate guide, and more XMAX articles are in the XMAX hub.
- Before your first session
- Loading the oven
- Switching on and heating
- Session mode and on-demand mode
- Temperature, timer, airflow and display
- After the session
- Common questions
- Using glass stems
1. Before Your First Session
- Remove the protection tab. The V3 Pro and V4 Pro manuals note that a protection tab sits in the battery compartment and must be removed before use.
- Charge fully. Use the supplied USB-C cable. The screen shows a charging indicator and stays on when the battery is full. The Starry 4 manual asks for at least six hours of charging before first use, and says the wall charger output must be no more than 5 V / 1 A or it may damage the device.
- Handle the oven gently. The manuals describe the oven as delicate and ask you to be gentle when packing it, inserting a cup or cleaning it.
A note on batteries: all three models take a removable 18650 cell. The manufacturer's battery health note says not to leave the device with a very low charge for long periods, because a battery that falls below 2% and stays there may no longer accept a charge. For charge times, runtime and swapping the cell, see our XMAX V3 Pro and V4 Pro battery life and charging guide.
2. Loading the Oven
- Pull off the magnetic cap or mouthpiece top.
- Grind your dry herb finely and pack it loosely into the oven chamber. Do not let it go above the top of the chamber.
- Check that the mesh screen in the oven is clean and seated. Both manuals include a cleaning tool for placing a screen.
- Refit the cap.
The Starry 4 manual also describes a dosing capsule: open the capsule, load it, and insert the capsule into the oven chamber.
3. Switching On and Heating
Click the power button three times in a row. The device switches on and heats to its default setting or the last temperature you used. Clicking three times again switches it off, and the device vibrates to confirm. While it heats, the OLED shows the temperature rising. Start drawing only once the device vibrates to tell you it is ready.
4. Session Mode and On-Demand Mode
Session mode (all three models)
The device heats, then vibrates when it reaches the set temperature, and the session timer starts counting down. The manual says to inhale through the cap while the timer runs and the device then does the rest automatically. The V3 Pro and V4 Pro have 4 and 6 minute timers. The Starry 4 has 4, 6 and 10 minute timers. To change the timer, hold the power button and the up button together for two seconds.
On-demand mode (V3 Pro and V4 Pro)
To switch between modes, click the up and down buttons together once. In on-demand mode you hold the power button to heat. The device vibrates when it reaches the set temperature and is ready, then vibrates three times and pauses heating after 30 seconds. Press and hold the power button again for another 30 seconds. If you do not use it for 30 seconds it goes into standby, and it powers off if it is left for a further 120 seconds. The Starry 4 manual lists session timers only, with no on-demand mode.
5. Temperature, Timer, Airflow and Display
- Temperature: press the up button to raise it and the down button to lower it. A click changes it by one degree, and holding changes it quickly. The V3 Pro and V4 Pro cover 100 to 220 °C, and the Starry 4 covers 100 to 240 °C.
- Celsius or Fahrenheit: hold the power button and the down button together for two seconds.
- Airflow (V4 Pro and Starry 4): push the air adjustment button up or down to change how open the draw is. The V3 Pro manual does not list an airflow control.
- Display flip (V4 Pro and Starry 4): both manuals list a screen flip option. On the Starry 4 you hold the up and down buttons together for two seconds.
- Reading the screen: the display shows the battery level, the target temperature, the current temperature and, in session mode, the timer.
If you are unsure where to start with temperature, begin low and move up a little at a time.

6. After the Session
- Do not touch the heating element straight after use. The manuals warn that components are hot.
- Let the device cool before storing it, in a clean, dry place away from children and pets.
- Clean the removable parts regularly. The manuals suggest brushing the oven, wiping it with a cotton swab dipped in isopropyl alcohol, and soaking removable parts other than the plastic cap for 10 to 20 minutes before rinsing and drying. A two-minute burn-off at maximum temperature after cleaning is the manufacturer's tip.
- Never clean the whole device with water or submerge it.
7. Common First-Session Questions
Why did heating stop in on-demand mode? That is by design. The device pauses heating after 30 seconds, vibrating three times, and you hold the power button again for another 30 seconds.
How do I change the timer or the mode? Hold the power button and the up button together for two seconds to change the timer. Click the up and down buttons together once to change between session and on-demand mode on the V3 Pro and V4 Pro.
Which model do I have? The V4 Pro has an airflow control that the V3 Pro lacks, and the Starry 4 is a shorter, wider device with a ceramic oven. Our naming guide sets them side by side.
8. Using Glass Stems
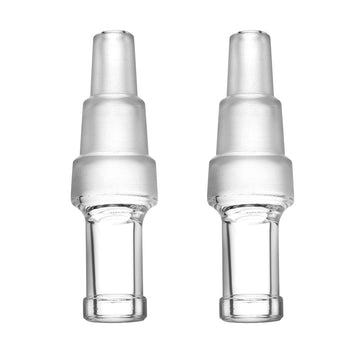
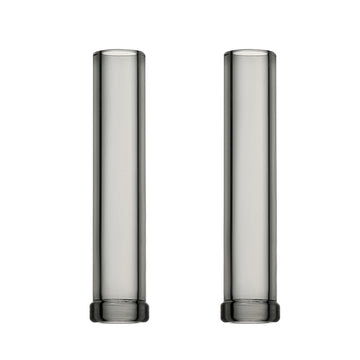
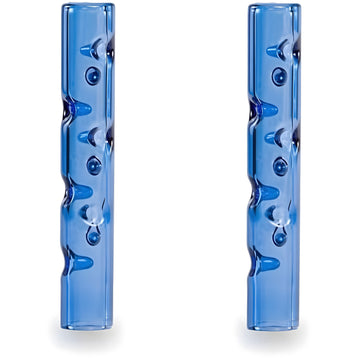
If you want a longer or cooler air path, the Vapetrix glass accessories are made for the V3 Pro and V4 Pro. Our accessories guide covers what fits and the black base the glass attaches to, and the glass mouthpieces comparison helps you choose. A simple first step is the long straight stem, and if you want a cooler draw without water, the 130 mm cooling beads stem. For water use, see our guide to the water pipe and bubbler options. Our accessories are not listed for the Starry 4.

Final Thoughts
The XMAX controls are simple once you know the shortcuts: three clicks to switch on or off, up and down for temperature, and a hold on the power button for on-demand heating. Pack loosely, wait for the vibration, and keep the oven clean. The V3 Pro, V4 Pro and Starry 4 differ in airflow control, timers and top temperature, so check which model you own before following any one step. Browse the XMAX V3 Pro and V4 Pro accessories collection for glass that suits your setup.